Portfolio
Fluxus theme offers two layout options for portfolio: Horizontal Layout and Grid Layout.
Quick Overview
To create a portfolio section on your website you have to do the following:
- Create a page and set it’s template to either Horizontal Portfolio or Grid Portfolio.
- Create some projects by going to
Portfolio > Add New - All your projects will be displayed on a page you have created on step #1
Note that “All” is emphasized, this means that if you will have two pages with Horizontal Portfolio template, they will both show the same projects. Go to Multiple Portfolios section to learn how to create categories for your projects.
Horizontal Portfolio
Displays your projects horizontally, scaling the images so that they fit in the viewers browser window.
Grid Portfolio
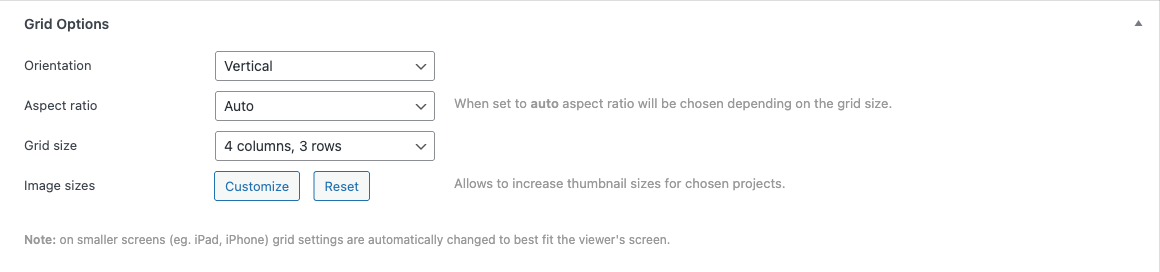 Arranges your projects in a predefined grid. If you have less than 12 projects, you might want to use a bigger grid. You can change the grid size by going to Pages and editing the page which has Grid Portfolio set as it’s template. On the bottom of the page there is Grid Options box, which allows you to specify grid orientation, aspect ratio and a custom grid size. The Customize button next to Image sizes additionally lets you enlarge chosen projects and change their cropping.
If grid portfolio is viewed on small screen, the grid size may automatically change from your predefined size in order to preserve nice layout.
Adding Portfolio Items
To add portfolio item go to Portfolio > Add New. Specify the name of your project and click Save Draft. After saving you will be able to see additional area named Project Options, use it to specify extra information about your project.
Adding Images
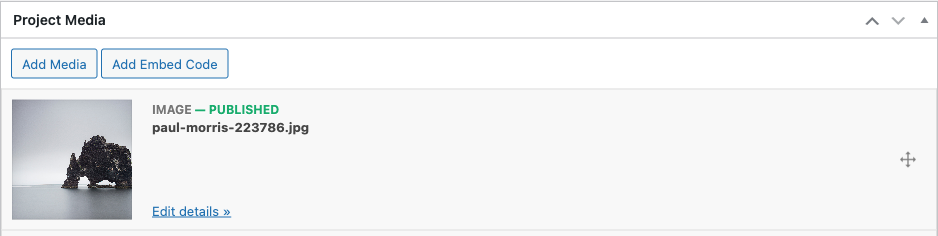 To add images find the Project Media box on the bottom of the project edit page. Click the Add Media button. Media browser will open where you can select existing images or upload new ones.
The image will be added to Project Media list. Click Edit details next to an item to enter a description, mark the image as featured or unpublish it. A featured image represents your project and it will get shown on horizontal and grid portfolios.
You can reorder the images and videos by simply dragging them in Project Media area.
Adding Videos
There are two ways to add videos to the Project Media list:
- Upload a video file. Click the Add Media button and upload or select a video file (MP4 is recommended) from your media library.
- Embed from YouTube or Vimeo. Click the Add Embed Code button and fill in the embed code taken from YouTube or Vimeo. Make sure it looks like
<iframe ...></iframe>.
Both video types have extra settings under Edit details: Loop mode (hides player controls, mutes and autoplays the video) and, for uploaded video files, Autoplay.
Project Options
Project Subtitle is displayed on top of project title. It can be useful for adding extra information to your project titles (e.g. Photography Series).
Project External Link is used to provide external link for your project (e.g. link to a magazine where this project is featured).
Project Information enables to add any amount of extra information related to the project. For example you can use it to give credits for calibration.
Feature Project Media Item
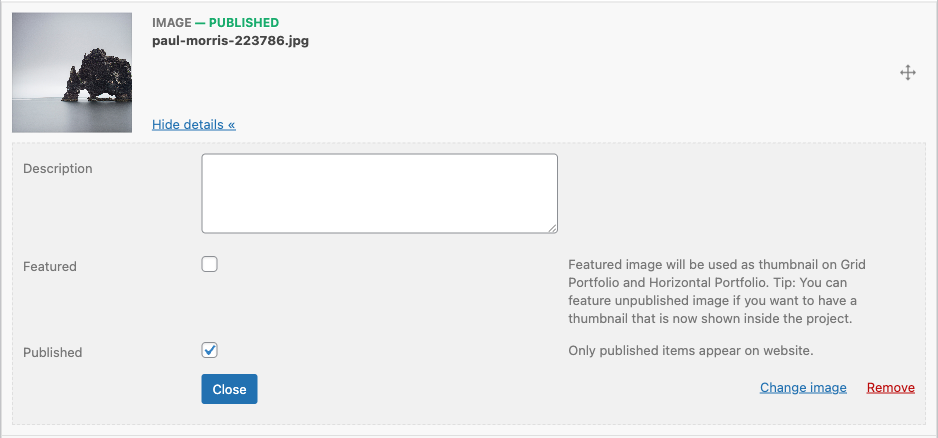 To feature an image, find it in Project Media list and click Edit details. Check the Featured checkbox, click Close and update the project. Only one featured item per project is possible, so featuring an item will “un-feature” any other media items in that particular project.
Only images can be featured. If your project consists of videos, add an image (for example a video still) to represent the project and mark it as featured. Tip: you can leave that image unpublished, so it acts as a thumbnail without being shown inside the project.
Note that if no item is selected as featured, then the first image will be used.
Project Media Order
To reorder your project images and videos simply drag them around in Project Media list. Note that since version 1.2.4 project media order is no longer automatically saved, you will need to click “Update” to save order changes.
Adding Project Types
Project types are used to filter your portfolio projects. They act like categories. To create a project type go to Portfolio > Project Types.
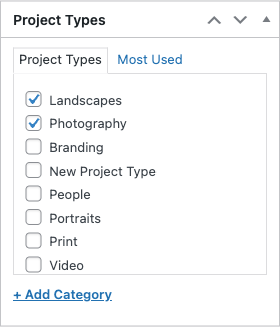 You can assign project types to your project on a project edit screen. Go to Portfolio, choose the project you wish to edit or create a new one. On the right hand side there is Project Types widget, where you can choose relevant project types.
Multiple Portfolios
Fluxus theme allows to have multiple main menu links that show different projects (and project types) to the user.
Let’s say you want to group your projects into a following structure:
- Personal Projects
- Travels
- Experiments
- Commercial Projects
- Fashion
- Weddings
You also want to place Personal Projects and Commercial Projects links in your main menu, so that users who click on them can only see projects that belong to those categories.
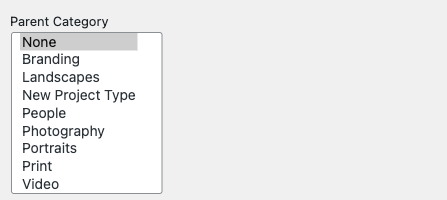 This can be done using hierarchical project types. Go to
 Portfolio > Project Types and create 2 project types named Personal and Commercial. Next create 4 more project types Travels, Experiments, Fashion and Weddings and make sure you assign their parent setting to either Personal or Commercial project type.
Now go to Appearance > Menus and find Project Types meta box. Use it to add Personal and Commercial project types to your main menu. Go to your website to see the changes. Clicking on “Personal” in main menu should show you all the projects that are tagged with Personal or any children tags (Travels, Experiments). It should also show only those Project Types that are the childs of Personal (in our case Travels and Experiments).
Note
If you can’t see Project Types meta box on the Menus page, then it is probably hidden. Click Screen Options on the top of the Menus page and select Project Types.
Ordering Projects
To reorder your projects go to Portfolio and click Quick Edit next to a project which position you would like to change. This will open project edit panel with an Order option. Changing the number will change projects position. Projects with lower values come first. If two projects have the same Order number than the one which were created more recently will be displayed first.
In other words - projects are sorted ascending by Order value and descending by creation date.